30.01.2013

Chocolate chip banana bread cupcakes/sjokoladeknapp bananbrød muffins

 IMG_1077

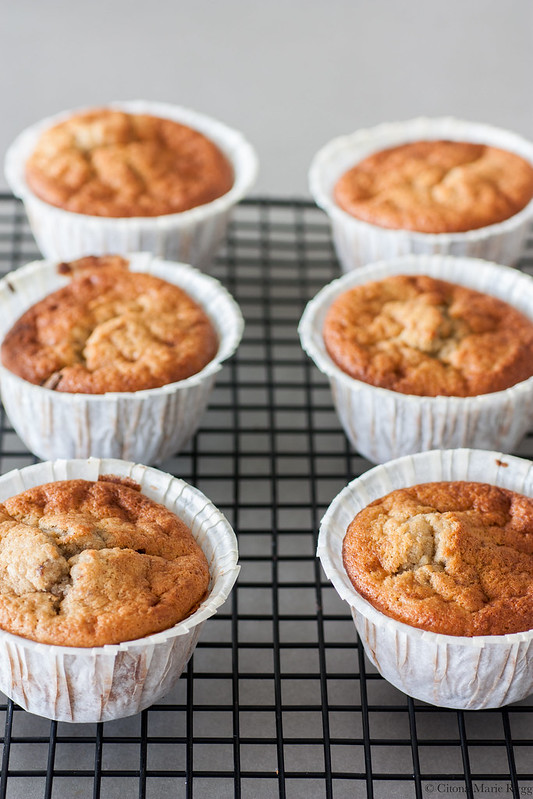
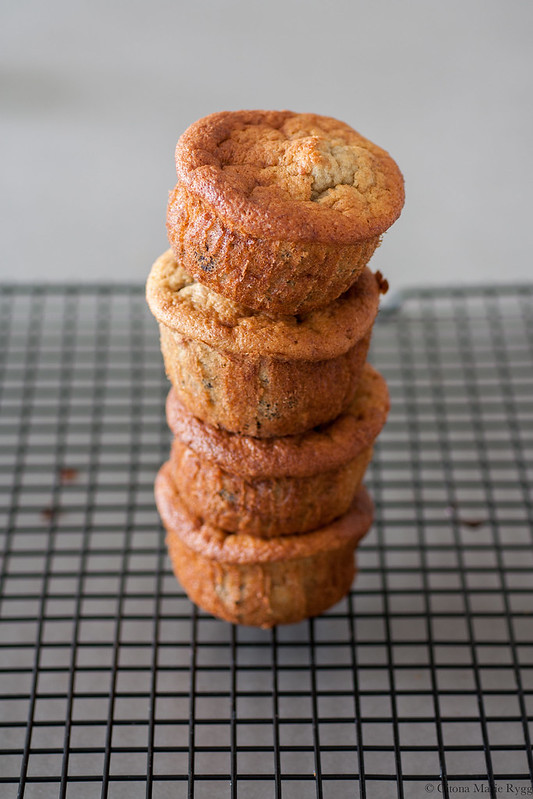
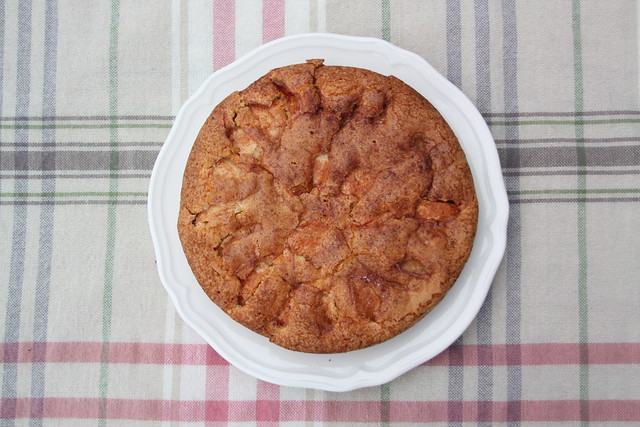
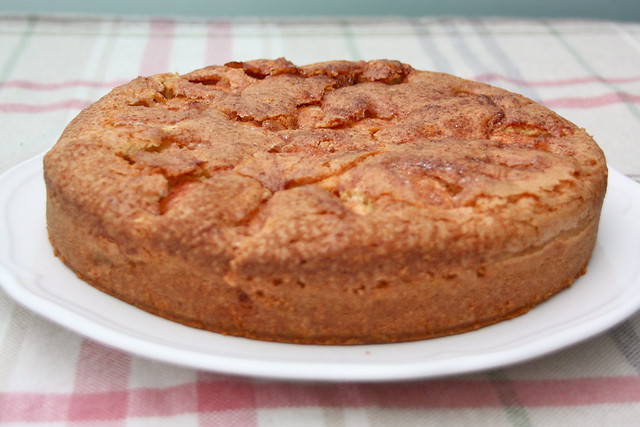
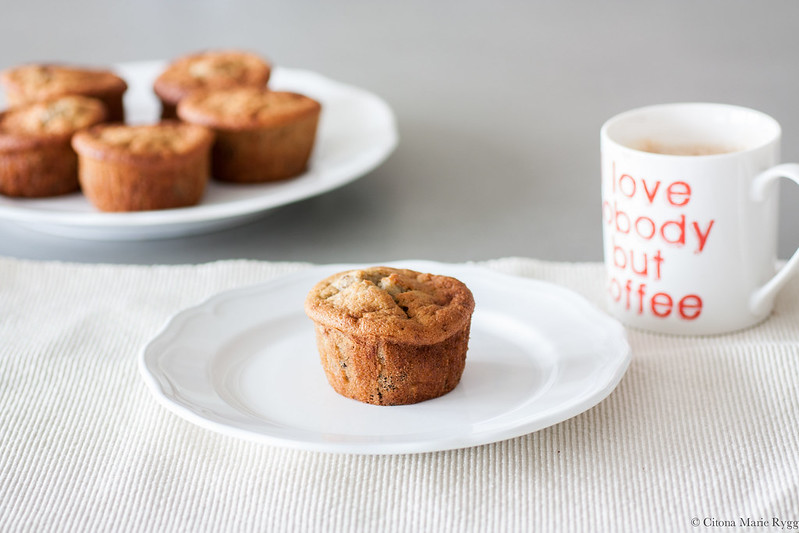
This was my first time not only making banana bread but also tasting it, and let me tell you, I am smitten! I love the banana taste with the dark chocolate bites and how it's quite dense, but still super moist. I think this is what they would call a breakfast muffin in America and although I don't eat sweets for breakfast, I think it might be a good idea to keep some in the freezer for days when cheering up is needed.

The recipe is super simple and very straight forward. The only part that might be new is to make your own buttermilk. Buttermilk is the stuff that's left over when you make butter out of cream. In America this is sold in stores and it's used quite a lot in baking. The acidity in it makes your cake very moist and I love to use it. The only thing is that they don't sell it here in Norway so you can either make your own,  use sour cream, "sour milk" (kulturmelk) or even yoghurt. I usually just make my own as I always keep milk and white vinegar in stock but if you can't be bothered I would recommend sour cream as a replacement.

IMG_1017 
Chocolate chip banana bread muffins (recipe adapted from Noshing with the nolands)
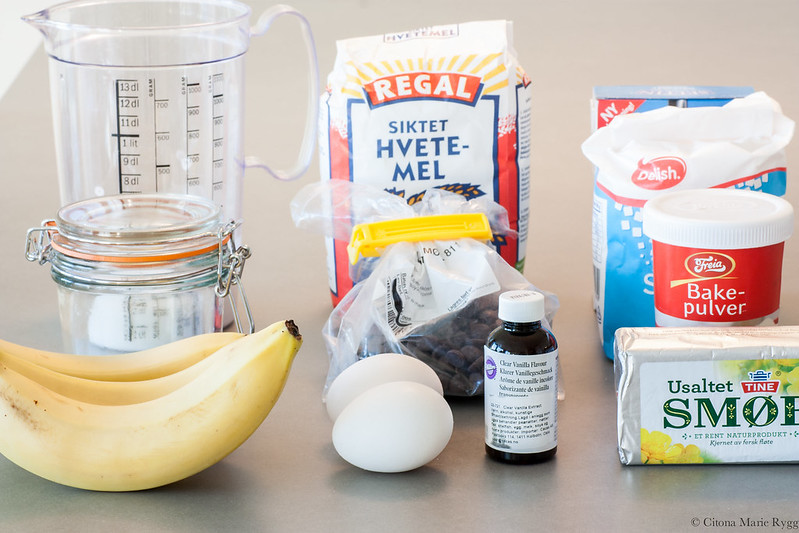
113 g butter (room temperature)
180 g sugar
2 eggs (room temperature)
180 g flour
1 tsp baking soda
1 tsp baking powder
1/2 tsp salt
3 rip bananas
1 cup buttermilk (can replace with sour cream)
1 tsp vanilla extract
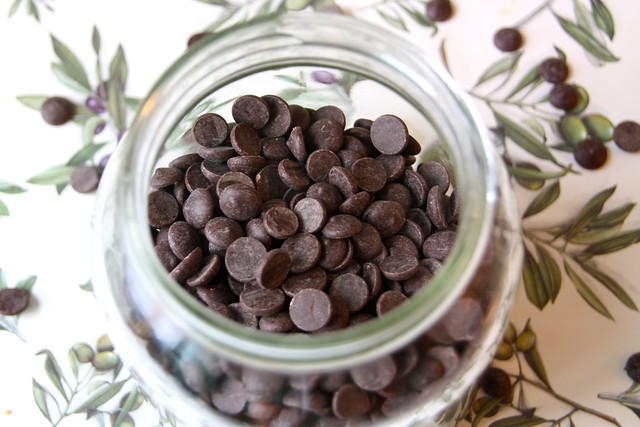
1 cup chocolate chips (mine are 57% callebaut)
A few drops of lemon juice

Sjokoladeknapp bananbrød muffins (oppskrift fra Noshing with the nolands, men har endret en del)
113 g smør (romstemperert)
180 g sukker
2 egg (romstemperert)
180 g mel
1 ts natron
1 ts bakepulver
1/2 ts salt
3 modne bananer
2,3 dl smørmelk (kan bruke rømme istedenfor)
1 ts vanilje ekstrakt
2,3 dl sjokoladeknapper (mine er 57% callebaut link)
Noen få dropper sitron juice

Set the oven to 350 fahrenheit/175 celcius

If you don't have buttermilk it's easy to make you own. Just take out a measuring cup, put 4 tsp white vinegar (or lemon juice) in it and then put in milk until you reach one cup. It needs to sit for about 15 mins so make this before anything else. If this sounds to complicated or you don't have the right ingredients than you can just use sour cream.

Hvis du ikke har smørmelk er det enkelt å lage sin egen. Bare ta et dl mål ha i 4 ts hvit eddik (eller citron juice) og ha så i melk til du når 2,3 dl. Den må stå i ca 15 min, så lag denne før du begynner på noen annet.

IMG_1019 IMG_1021 IMG_1024 
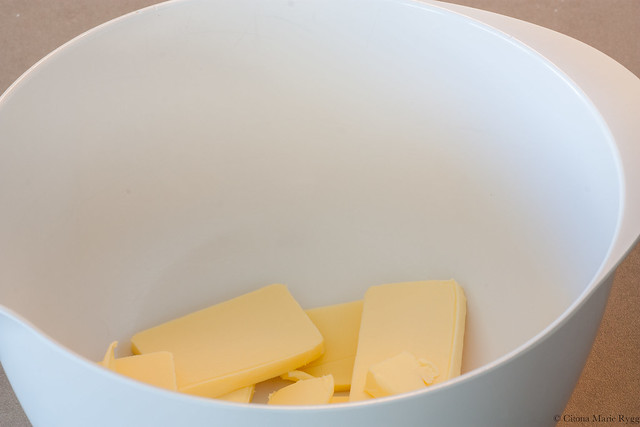
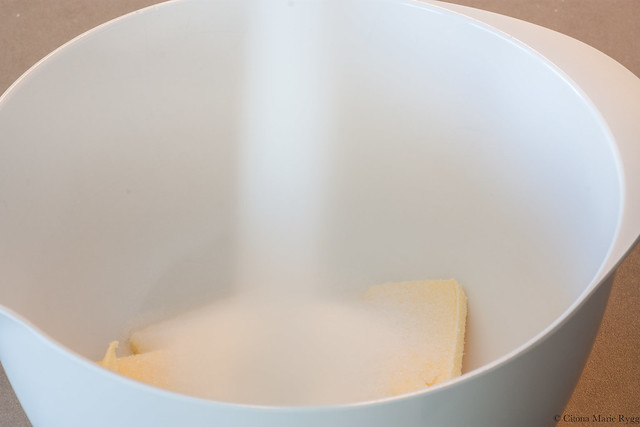
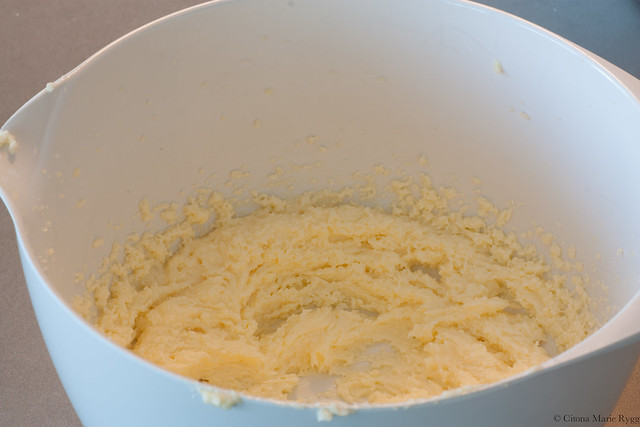
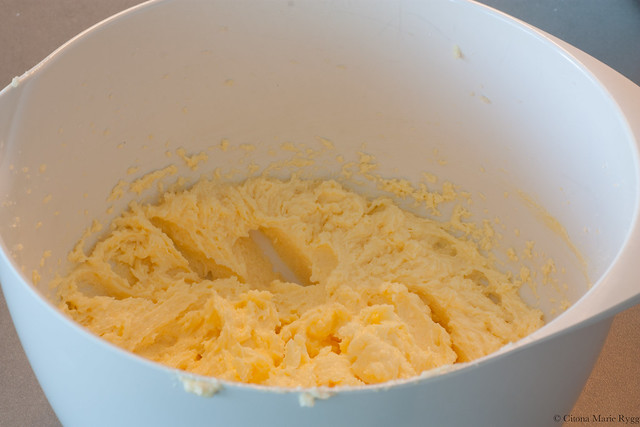
Put your butter and sugar in a bowl and mix until light and fluffy (about 5 mins)

Ha smør og sukker i en bolle og miks til det er lyst og fluffy (ca 5 min)

IMG_1025 IMG_1026 IMG_1027 IMG_1028
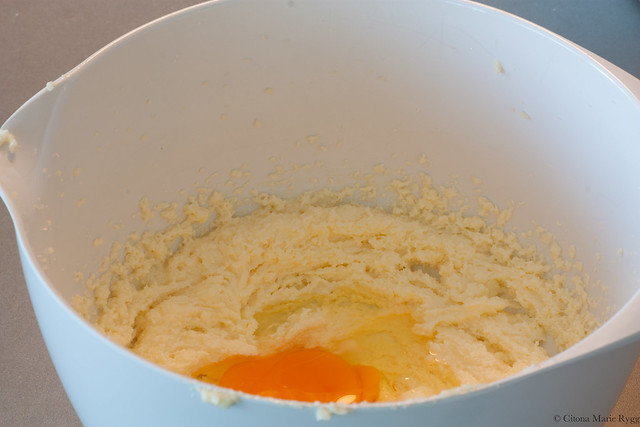
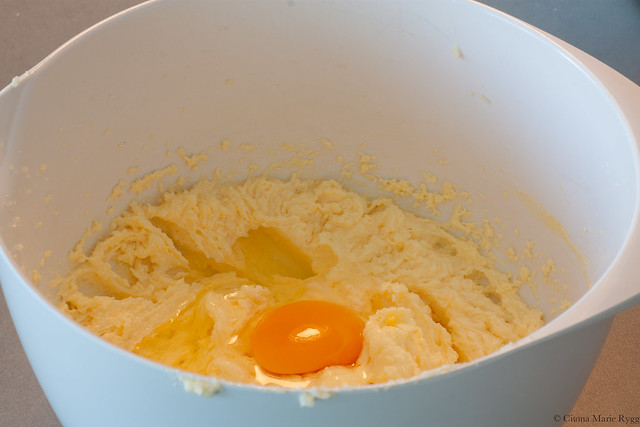
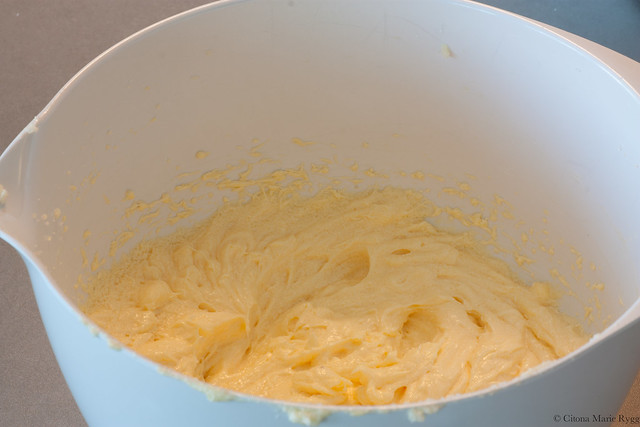
Add one egg at a time, mixing well between each addition

Ha så i ett egg av gangen og bland godt

IMG_1029 IMG_1030
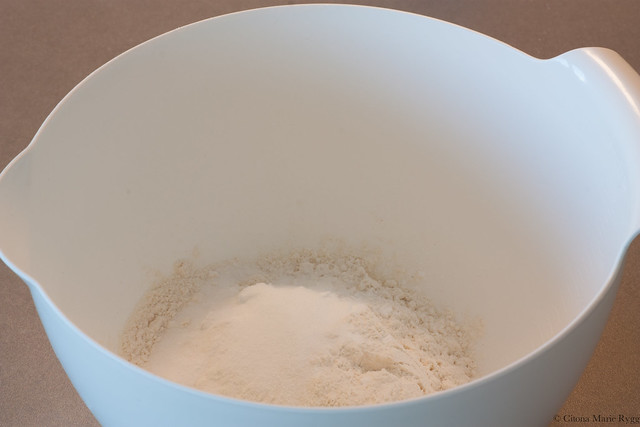
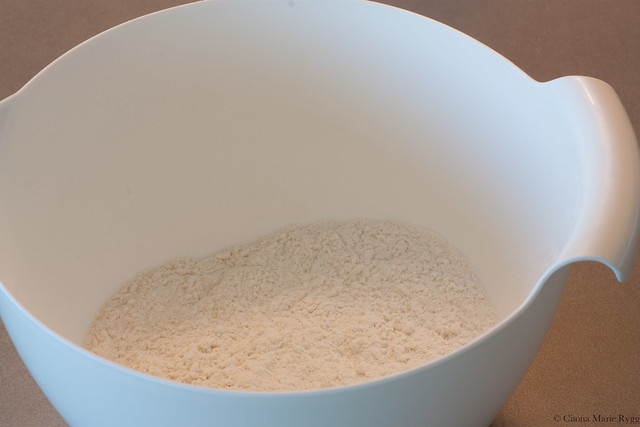
Putt all of your dry ingredients in a bowl and mix until it's all well blended

Ha alle de tørre ingrediensene i en bolle og bland godt

IMG_1033 IMG_1035
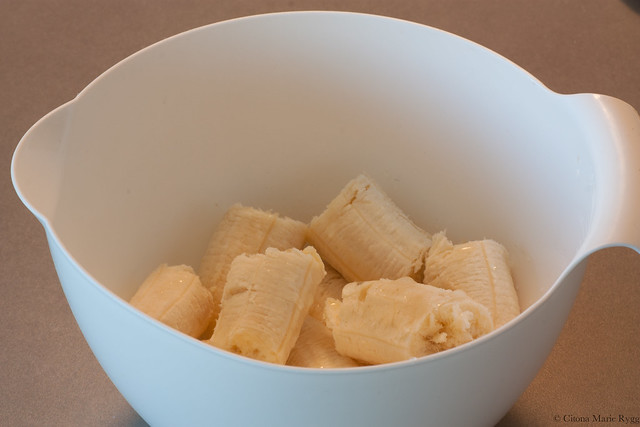
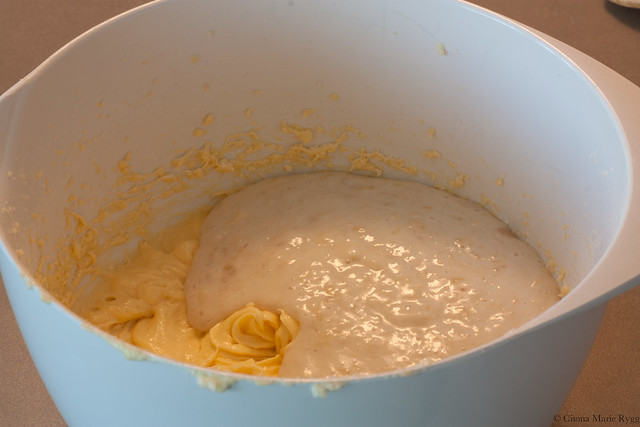
Put your bananas in another bowl with some lemon juice (to prevent browning) and mix until it's a mushy mess

Ha bananene i en annen bolle med litt citron juice og mos til det er en tykk smørje

IMG_1036 IMG_1038
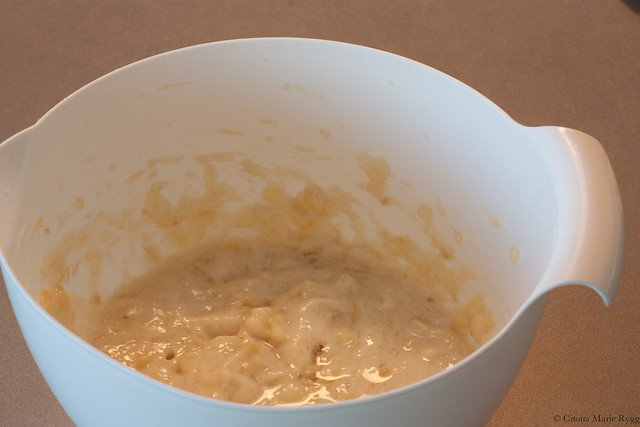
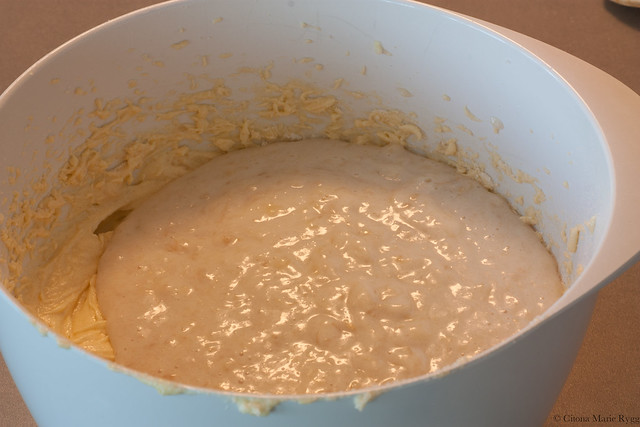
Add your buttermilk and vanilla to the banana mush and mix well

Tilsett smørmelken og vaniljen til bananmosen og bland

IMG_1039 IMG_1040 IMG_1041 IMG_1043 IMG_1045 IMG_1046
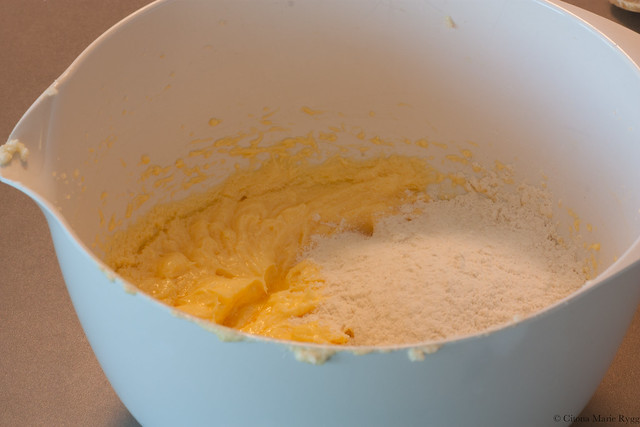
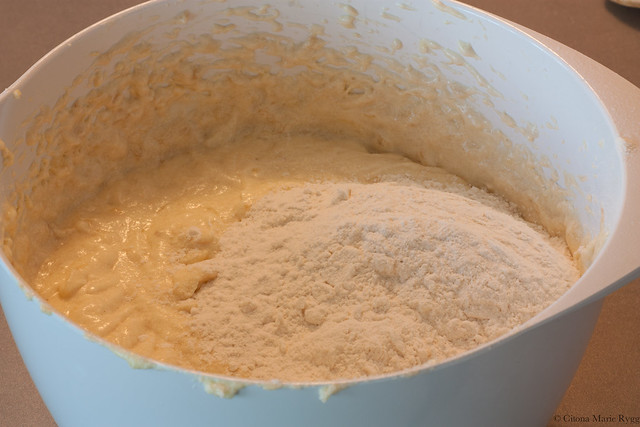
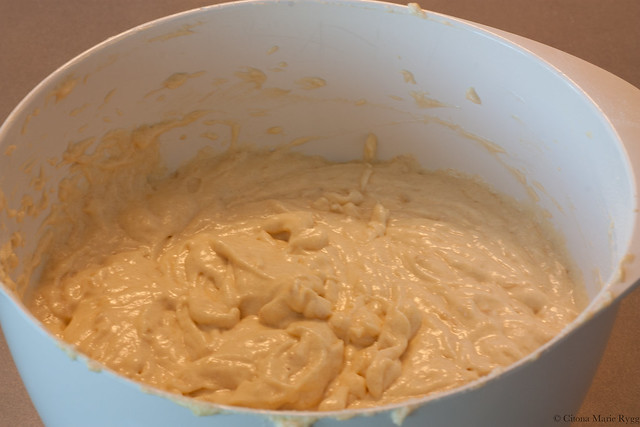
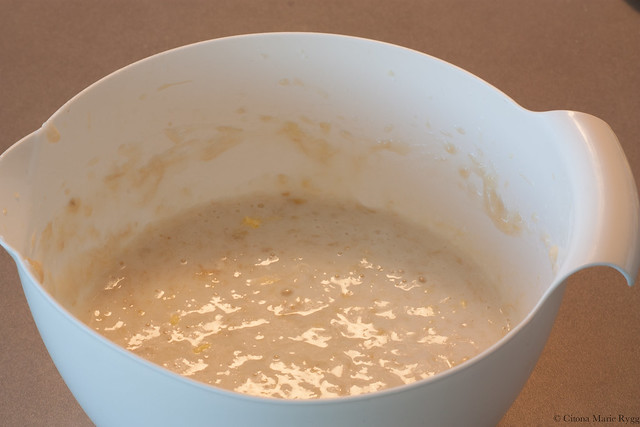
Now we're going to alternate between the wet and dry ingredients. When doing this always begin and end with the dry stuff. Here it's dry-wet-dry-wet-dry. Remember to incorporate well after each addition but do not overmix.

Nå skal vi bytte på å ha i tørre og våte ingredienser. Når man gjør dette er det viktig å alltid starte og slutte med den tørre blandingen. Denne gangen blir det da tørr-våt-tørr-våt-tørr. Husk å blande godt etter hver addisjon, men ikke for mye!

IMG_1049 IMG_1050
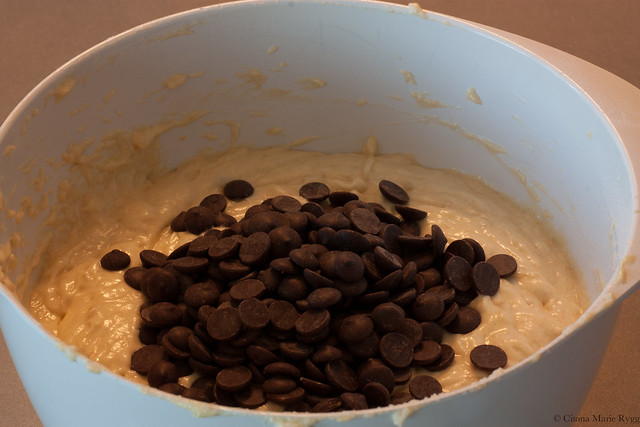
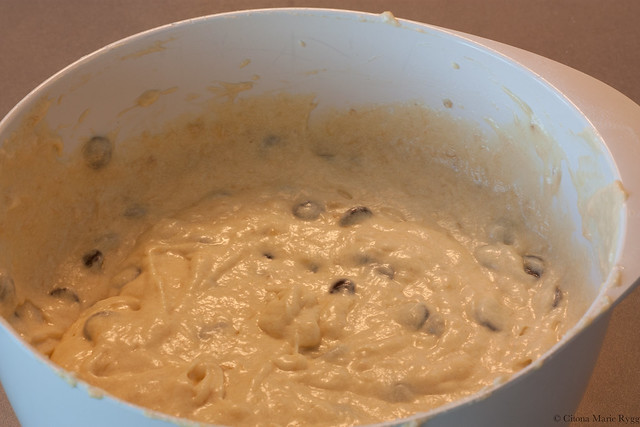
The least step is to add the chocolate chips, using a spatula to carefully blend them with the dough.

Det siste steget er å ha i sjokoladeknappene. Bland de forsiktig inn sammen med en slikkepott.


The baking time for this vary a lot depending on the size of muffin liner you use. The small cupcake size I would say about 10-15 min, while the big ones i use (three times the size of cupcakes) took about 25 mins. Just keep your eye on it and check them with a toothpick when they start turning golden brown.

Steke tiden for disse varierer veldig ettersom hvilken størrelse du lager. Små i cupcake størrelse vil ta ca 10-min, men mine (som er tre ganger så store som det) tok ca 25 minutter. Bare husk å sjekke med en tannpirker når de begynner å bli gyldene i fargen.


 IMG_1057 
 IMG_1067 

12.11.2012

Chocolate chip cookies

IMG_0079

You know I never got the whole chocolate chip cookie thing before. I always preferred the dough to the finished product until I met this recipe. Now, don't get me wrong, the dough is still divine but so are the cookies. They are crispy, chewy and buttery heaven just like a chocolate chip cookie should be.

Jeg skjønte aldri helt denne kjærligheten folk har for chocolate chip cookies. Jeg har alltid foretrukket deigen framfor det ferdige produktet; helt til jeg fant denne oppskriften. Deigen er fortsatt like fortreffelig, men forskjellen er at det ferdige produktet også smaker himmelsk. Den "hemmelige" ingrediensen er Maizena mel (maisstivelse) som gjør kjeksen "tyggete" og myk på innsiden. 

Chocolate chip cookies (recipe from apple a day)
170 g butter
140 g brown sugar
60 g sugar
1 egg
2 tsp vanilla extract
250 g flour
2 tsp cornstarch
1/2 tsp salt
1 tsp baking soda
170 g chocolate chips (mine are 57% callebaut)

Chocolate chip cookies (oppskrift fra apple a day)
170 g smør
140 g brunt sukker
60 g sukker
1 egg
2 ts vaniljeekstrakt
250 g mel
2 ts maizena
1/2 ts salt
1 ts natron
170 g chocolate chips (mine er 57% callebaut link)

Set the oven to 350 fahrenheit/175 celcius (165 varmluft)
1. Cream together the butter and sugars until light and fluffy
2. Add the egg and vanilla
3. In a separate bowl mix all the dry ingredients
4. Add the dry ingredients to the butter mixture and mix
5. Add the chocolate chips and mix them in with a spatula
6. To make all the cookies even in size I like to use an ice cream scoop. If you don't have one just use a spoon. Make sure to leave some space between each cookie as they will spread a lot in the oven.
7. Let them cook in the oven for maximum 10 minutes, propably less. They're done when they have a teeny tiny bit of color. We want them chewy, not hard so it's important to pay attention. They will be completely soft when you take them out so let them harden a bit before you transfer them to a cooling rack. And you're done! 
1. Krem sammen smøret og begge sukkertypene til blandingen er lys og fluffy
2. Tilsett egget og vaniljen
3. I en separat bolle blandes alle de tørre ingrediensene
4. Tilsett det tørre til smørkremen og bland godt
5. Tilsett sjokoladechipsene og bland dem jevnt med en slikkepott
6. For at kjeksene skal få en jevn størrelse liker jeg å bruke en iskremscoop slik at hver "ball" er like stor. Har du ikke en slik så kan du bruke en skje. Pass på at du lar det være litt plass mellom hver "ball" for de vil spre seg masse i ovnen.
7. La de steke i ovnen i maks 10 minutter, antageligvis litt mindre. De er ferdige når de har fått bittelitt farge. Vi vil ha de "tyggete", ikke harde, så det er viktig å passe tiden her. Når du tar de ut av ovnen vil de være helt myke, så la de hvile og stivne litt på stekebrettet før du flytter de til en rist. Ferdig!

IMG_0022


01.11.2012

Apple cake /eplekake

IMG_9949

When the crisp and clean fall air comes around each year all I want to do is drink hot cocoa and eat apple-y cinnamon-y stuff. The first thing on my baking list is then obviously a super delicious apple cake. This repice is very simple and does not call for any complicated baking methods or ingredients. So there isn't really anything stopping you from baking this cake right now.

As you can tell by the pictures I'm not a big fan of using too much apple in my cake. But this is a matter of preference; you can use as many apples as you'd like in your cake. So, let's get started!

Apple cake
150g unsalted butter at room temperature
250g sugar
2 eggs
0,6 cups cream
300g flour
2 tsp baking powder
1 tsp vanilla extract
1 tsp cinnamon
3-5 apples
+
sugar and cinnamon to coat the apples and to spread on top of the cake

Eplekake
150g usaltet smør romstemperert
250g sukker
2 egg
1,5 dl fløte
300g mel
2 ts bakepulver
1 ts vaniljeekstrakt
1 ts kanel
3-5 epler
+
sukker og kanel til å dekke eplene og strø på toppen av kaken

IMG_9952

Set the oven to 350 fahrenheit/ 175 celcius
1. Whip butter and sugar white
2. When the butter and sugar mix is white add the eggs one at a time, mixing well between each addition.
3. Mix the dry ingredients in a different bowl.
4. Peel and cut the apples, put them in a plastic bag and add as much cinnamon and sugar as you want and shake until it has covered all of the apples.
5. Add the mix of dry ingredients with the butter and sugar mix alternating with the cream. When alternating wet and dry ingredients always begin and end with the dry ingredients.
6. Now you have two options. You can either add the apple bites to the dough, stir them in and then add the mixture to the pan or add the dough to the pan and then put the bites in. Again, this is all about preference.
7. Put in the oven and let cook for about 45 - 60 mins.
8. Let cool and then eat with some vanilla ice cream and hot cocoa!

1. Pisk smør og sukker hvitt
2. Når smøret og sukkeret er lyst nok, tilsetter du eggene ett av gangen. Pisk godt mellom hvert egg.
3. Bland de tørre ingrediensene i en annen bolle.
4. Skrell og del opp eplene, putt bitene i en plastpose, tilsett så mye sukker og kanel som du vil og rist posen til alle bitene er dekket av sukker og kanel.
5. Tilsett blandingen av tørre ingredienser til smørblandingen og bland annenhver gang med fløten. Når man blander ingredienser på denne måten er det viktig å alltid begynne og slutte med de tørre ingrediensene.
6. Nå har du to valg. Du kan enten putte alle eplebitene i røren og blande eller putte røren i formen og så presse ned bitene. Det spiller ingen rolle hvilken metode du velger.
7. Sett i ovnen og stek i ca 45 -60 min.
8. La den kjøle seg ned og nyt med litt vaniljeis og varm kakao!

IMG_9968

24.06.2012

Foolproof choux pastry/idiotsikker vannbakkelsdeig


These past three days while I've been working on this post the rain has been pouring down. This is my favourite kind of weather for several reasons. Number one: Great food photography light. Number two: It's allergy season and the rain prevents the pollen from spreading too much which makes me happy. Number three: My concience is clear even though I've stayed inside working on this post far too long (while having a vlogbrothers marathon).

Now you're propably wondering how I could spend three whole days on a post with foolproof choux pastry. This is not the fault of the dough as it was successfull the first time, the way it always is. The villain of this post was the pictures of the finished eclairs. Eclairs are a French dessert and my brain always tells me that everything French is elegant and photogenic, but this is not the case with eclairs. They are surprisingly unphotogenic and awkward in pictures. Lucky for them they taste absolutely marvellous so I didn't give up and today my persistence payed off. I love the simplicity of the pictures and although you don't need a fork to eat an eclair, the fork is very photogenic so it was allowed in the pictures. It is times like these that I love my inner perfectionist, had I not been a perfectionist the pictures would have been bad bad bad and you might not have wanted to make eclairs. Patience pays off people!

Read before you begin: This really is a foolproof pâte à choux or choux pastry dough. The only time it has failed me was when I undercooked them, so make sure that they are properly done (not wet on the inside) before you take them out of the oven (check by taking one out and opening it). With this recipe there is no need to have room-temperature ingredients, so it doesn't take as much planning as a cake would. This is a classic choux pastry dough so you can make profiteroles, eclairs, croquembouche (like they did on masterchef, definitely trying that sometime) or beignets (deep-fried choux pastry!) from this, as you can tell by the picture above, I chose eclairs. Eclairs are a classic French pastry usually filled with a custard and dipped in chocolate. This post only provides the recipe for the choux pastry, the custard recipe will come soon in a separate post. Now let's begin!


Vannbakkelsdeig (lager ca 13 små eclairs) © min egen oppskrift
70 g smør
2 dl vann
90 g mel
2 egg

Choux Pastry (makes about 13 small eclairs) © my recipe
70 g butter
0,9 cups (200 ml) water
90 g flour
2 eggs


Sett ovnen på 200 celcius (190 varmluft)/Set the oven to 390 fahrenheit


Ha vannet og smøret i en gryte på lav/medium varme

Put the water and butter in a pot on low/medium heat


La smøret sakte smelte uten at det koker

Let the butter slowly melt without boiling


Når smøret har smeltet blander du det sammen og skrur opp varmen på maks

When the butter has meltet stir and set the heat to maximum


Når blandingen har begynte å koke tar du den av platen med en gang

When the mixture is boiling immedeately remove from the heat


Ha i alt melet på en gang

Put in all the flour at once


Rør sammen til deigen slipper kantene og ser slik ut. La deigen stå og kjøle seg i 10 min før du går videre til neste steg.

Stir until the dough lets go of the edges and looks like this. Let the dough cool down for about 10 mins before you move on to the next step.


Ha i det første egget

Put in the first egg


og rør sammen

and mix


Ha i det andre egget

Put in the other egg


Og rør sammen. Deigen bør se slik ut.

And mix. The dough should look like this.


Ha deigen i en sprøytepose. Den enkleste og reneste måten å gjøre dette på er å ha posen i et glass og brette kantene over glasset. Da holder toppen seg ren og du slipper å bli så klissete på hendene.

Transfer the dough to a piping bag. This is easily done by putting the pipingbag in a tall glass and folding the bag over the glass edges. This will keep the top clean so your hands wont get sticky.


Ha bakepapir på et brett, klipp et ganske stort hull i posen (ca 2 cm bredt) og sprøyt i vei! Mine er ca 7 cm lange og blir ganske små, men lag gjerne større (eller mindre). Sett brettet inn i midten av ovnen og la dem steke i ca 30 min til de er gyldne og harde på utsiden. Ikke ta dem ut for tidlig, da vil de falle!

Put a baking sheet in a sheet pan, cut quite a large hole in your bag (about 2 cm) and start piping! Mine are about 7 cm long and quite small but feel free to make bigger (or smaller). Put the pan in the middle of the oven and let them cook for about 30 mins until they are golden and hard on the outside. Do not take them out early, if you do they will deflate!


Ta brettet ut av ovnen og legg eclairene på en rist. Skjær en strek i siden på dem med en gang for å slippe ut den varme luften.

Take the pan out of the oven and transfer them to a cooling rack. Immediately cut open one side of the eclair to let the varm air out.


Hvis du har fulgt alle stegene nøye kan jeg med 99% sikkerhet si at du har perfekte eclair foran deg :) 

If you have followed these steps closely I can say with 99% certainty that you have perfect eclairs in front of you :)


 Enjoy! :)

- Citona Marie